My Suzuki GSX-R 750 a complete history: Upgrade Time 2002
After first oil-change and new tires. Aug 2002. After riding a few miles she ran much better than expected. Once being parked all day, some new oil leaks surfaced. I replaced some gaskets, and started dialing in the rear shock. I cranked down on the preload and increased the compression damping until I got the sag right. I also increased the front end damping to "4" on the indicators. The factory damping is normally not that effective, but it made a big enough difference to help reduce the front end acting like a pogo-stick through bumpy corners. The front end is next on the list for upgrade/rebuild.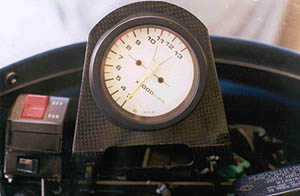
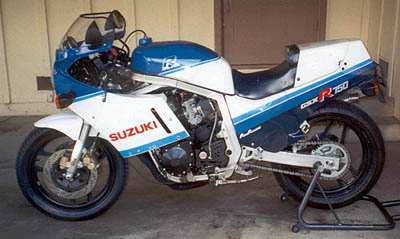
Yoshimura Carbon fiber tach bracket for an '88 GSX-R and repositioned starter button. I moved this when I added the aftermarket push-pull throttle assembly.
Author's note: the below commentary was written after I completed the original site in 2002.
- Roscoe 2002The story now continues . . .
Follow the progress into the 21st Century:
Aug. 9, 2002 - New Tires (Metzeler MEZ4's), 1,000 mile oil change
Oct. 8, 2002 - New levers, new rubber fairing spacers, new tank mount rubber
Dec. 22, 2002 - '86 1100 front caliper and rotor conversion, new front pads
Dec. 23, 2002 - New chain, new front/rear sprockets, '86 1100 rear wheel conversion, new rear rotor, new rear brake pads, new MEZ4 160/60 rear tire
Feb. 8, 2003 - Rebuilt forks w/Race Tech Emulators and correct weight springs
Feb. 8, 2003 - Ohlins Rear Shock
During October, I picked up an old '86 1100 parts bike sans engine from my good buddy Mike Kertscher at MSK Racing. The purpose of this frame, plastic and parts was to provide spare and upgradeable parts for my 750. I started with an old trick my racing friends in the 80's used. You can bolt up stock rotors and calipers from an '86 or '87 1100 directly to a first generation 750 to give a bit more grip and feel. The stock '87 750 rotors are 300mm, and the 1100's 310mm. Not a big change, but there is a decent amount of difference when they are bolted up. It is a completely "bolt-on" conversion. No drilling, measuring or machining. 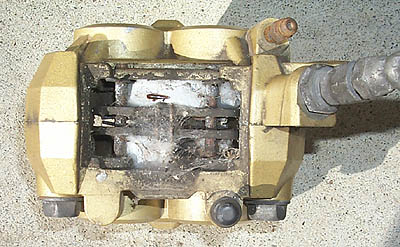
The 1100 calipers before cleaning. 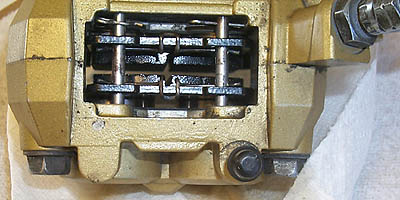
The 1100 calipers after cleaning, and with new pads installed. I hand polished all of the parts before assembly. Luckily, the seals were still good, so a rebuild was not necessary. 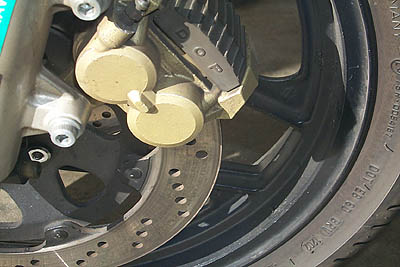
Stock rotors and calipers. My rotors were severely glazed and worn, and stopping power was not nearly as good as it could have been. 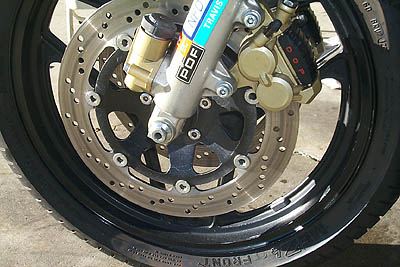
The 1100 rotors and calipers bolted on. The short but quick ride after the installation confirmed that this was a cheap and decent upgrade. After the brake conversion, I proceeded with the next step. Replacing the stock 750 3.5" rear wheel with an 1100 4" rear wheel. I added a fresh Metzeler MEZ4 and a new rear rotor from my parts bin. I also added new brake pads, and bled the rear line. During the wheel swap, I also replaced the chain and sprockets. I upped the rear sprocket from 42 to 46 teeth. I figured this would help keep my revs up out of corners up a bit, and help my corner exit acceleration as well. I had done this before, and it was very useful in tight, twisty corners. It also helped keep the useful rev-range above the 4K flat spot.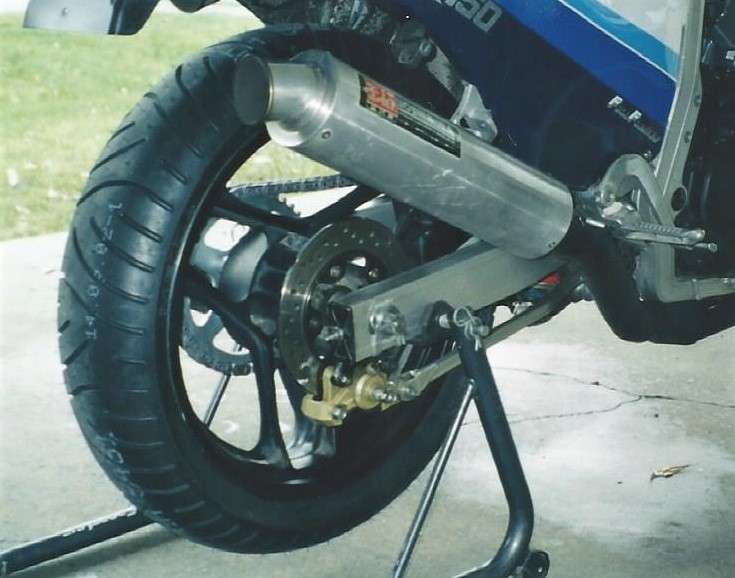
New rear rotor, 1100 wheel and MEZ4 tire. 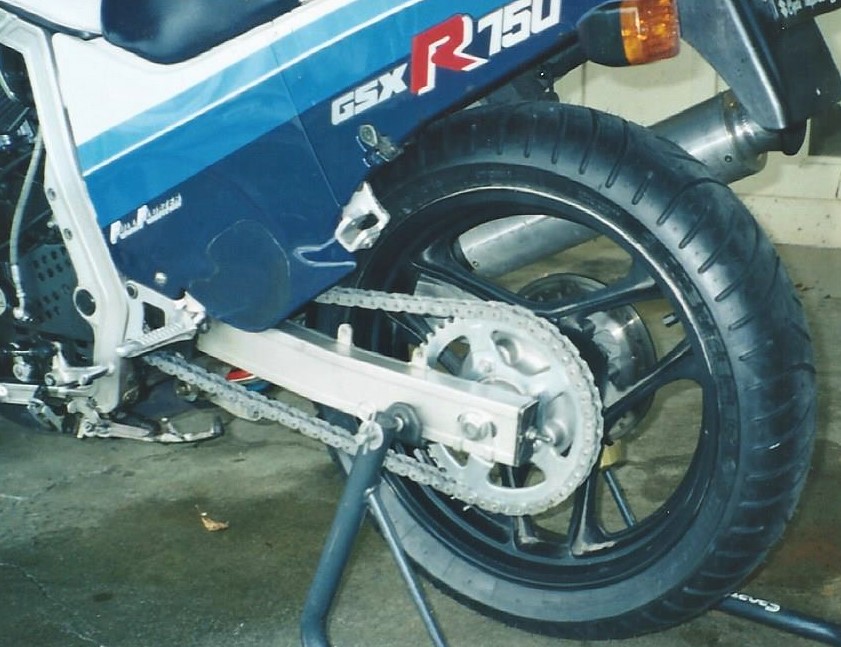
Fresh RK XSO 530-114 chain, and new sprockets. On a quick tire scrub-in ride, the combined changes were readliy apparent. She ran smoother, and rolled into the corners with less effort due to the wider wheel. I was able to easily keep the revs up in the corners, and exit quickly. Some very nice and much needed work.
One of the things I had wanted to do to this bike for years was to clean up the lines a bit by getting rid of the passenger
pegs and rearsets. BUT, I wanted to retain the stock plastic. The rearset mounts are essential for keeping the plastic in
place. The solution? The "Chop-Mod".
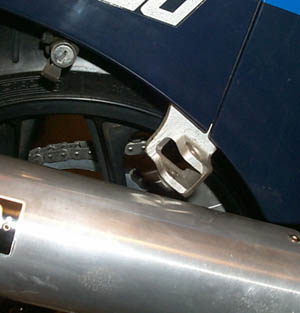
The right-side passenger mount before starting. My plan was to cut the passenger peg mount off the rearset, and retain the rest to still allow original bodywork retaining mounts.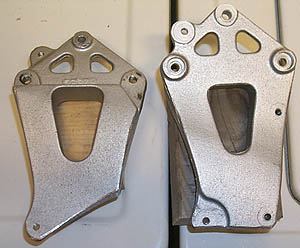
The left and right-hand side after removing the mounts with a Saws-All. My plan was to cut the passenger peg mount off, and retain the rest to attach the bodywork to. The DeWalt saw made short work of the mounts, and my friend Dave's air tools came in handy to round them off and smooth them out.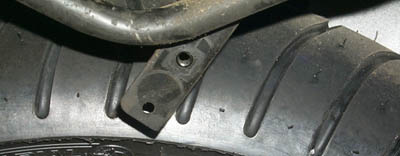
A sticking point, the helmet lock on the right-hand side. 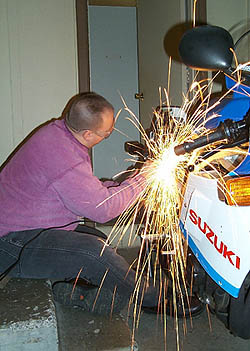
Using the air grinder to remove the helmet lock mount. 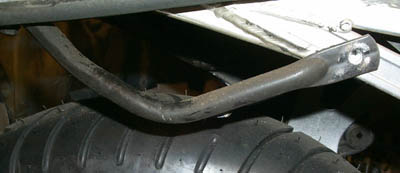
Nice and clean. You never knew it was there. After pulling off the bodywork and passenger mounts, the helmet lock mount was also in the way, and inhibited the "clean-line" look I was after. I used an air grinder to remove it. The mod was really coming together at this point.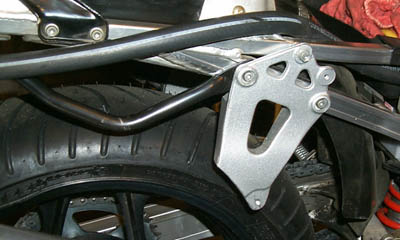
With the mounting bracket in place, and the rear seat rail cleaned up. 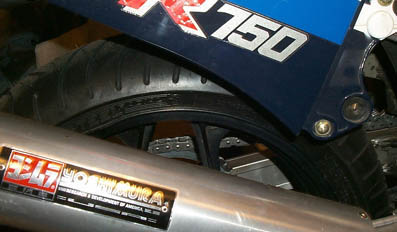
All finished. How about that difference? With everything reassembled, she looked darn good. I was impressed at how quickly I got this done. I used some spare parts I had lying around, so my original parts are saved. I still try and retain all of my original GSX-R parts where possible.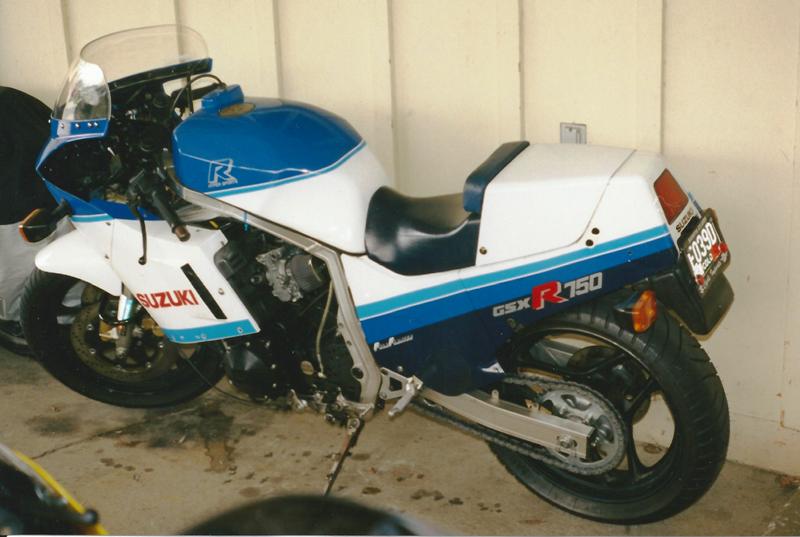
A very short lived variant sans mirrors after I completed the "Chop Mod". This was entirely too dangerous to ride on the street so I reinstalled them. |